Sheetrock, plasterboard, wallboard. However you want to call it, drywall has been an important factor in executing room noise control strategies. For home theaters, installing at least two layers of drywall is an effective soundproofing technique.
How Much Drywall Do You Need
- Measure the square footage of the coverage area (walls + ceiling). Disregard the windows and doors.
- Walls – Multiply the width and height = square footage of the walls
- Ceiling – Multiply the length and width = square footage of the ceiling
- Add the square footage of walls and ceiling to get total square footage.
- Divide the sum by however many square feet of drywall sheet you will be using.
For example, your room is 10’x10’ with 8” high ceilings. The walls will be 320 square feet, while the ceiling is 100 square feet. Add the square footage of the walls and ceiling, and you get 420 square feet of drywall area needed. A 4’x8’ drywall will cover 32 square feet, a 4’x10’ will cover 40 square feet, and a 4’x12’ will cover 48 square feet. If you’ll be using 4’x8’ drywall panel, you will need 14 sheets to cover 420 square feet, 11 sheets of 4’x10’, and 9 sheets of 4’x12’.
Transporting Drywall
Drywall is heavy. A regular ½’ sheet of drywall measuring 4’x8’ is about 55 pounds. And that’s just one sheet. You need around 35 sheets for a 1,000 square feet room. Unless you have an assistant to make carrying and installing drywall easier, it’s best to hire a contractor. If your home theatre room is on the second floor or in the basement of your house, transporting drywall can be a difficult task – you’ll have to get each sheet in your house, taking the stairs, maneuvering around things, making sure you don’t scrape the walls, navigating around the living room, kitchen, and other areas of your house. If you’re taking on this project alone, you will need a drywall sheet carrier – it is used for transporting drywall one at a time and has an offset, grip handle and wheels for easy use.
How to Cut Drywall
Lay the drywall on a level, dry surface. Measure the length you need using a tape measure or a T-square. Mark where you need to cut the panel with a pencil and score it using a utility knife. Using a T-Square as a guide, make one continuous cut along the mark, through the top layer of paper and into the core. Snap the panel along the mark and away from the score cut. Score the back of the panel with a utility knife to cut the paper and snap it back. Sand the edges to take out any roughness.
For short cuts such as spaces for light switches and power outlets, you can use a small keyhole-type drywall saw. A larger coarse-tooth saw is for long cuts like those around doors and windows, while a circle cutter is used if you have curved spaces to work with.
Make sure your cutting tools are sharp. Blunt blades can tear the paper face of the drywall, making the seam rougher and more difficult to finish.
How to Hang Drywall
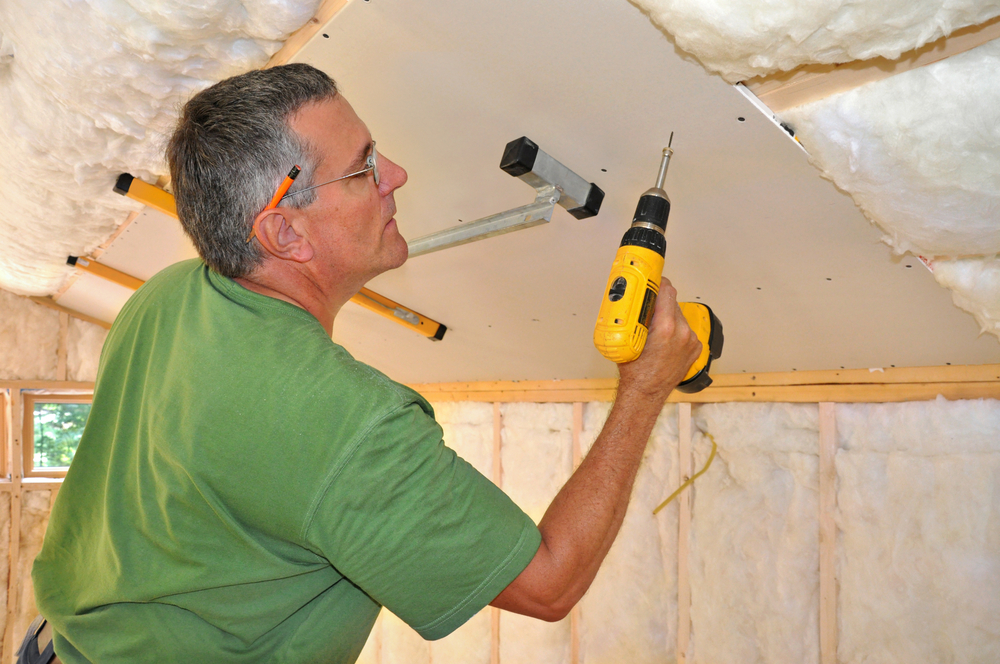
To determine where you need to place the first sheet of drywall in your home theater, measure out from a corner, vertical to the joists. Each end of the drywall should land on a joist or studs used to frame your space. The main thing to remember is to avoid hanging an end piece of drywall sheet that’s not supported by a joist or stud. Apply drywall adhesive to each stud and joist before hanging the drywall. Start hanging from a corner, and move in a straight perpendicular line. Cover the ceiling first – this is a two-person job as someone will have to hold the sheet up on the ceiling while the other screws it in place. Gun in at least five screws on a stud, hitting each stud behind the drywall. Once you’re done with the ceiling, start on the walls. The drywall should be hung horizontally. Hoist the top sheet first. Attach it to the sheet on the ceiling and screw in place. Continue working around the room until all drywall surface area is covered. Cut around doors, windows, and other fixtures.
Hide the Joint
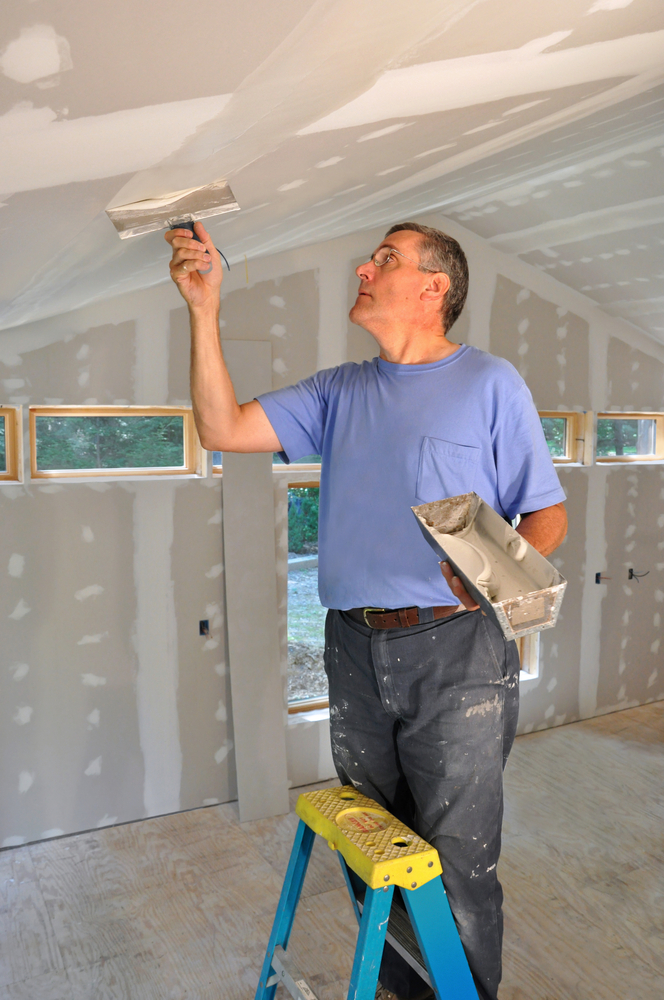
A joint is where two drywall sheets meet. The rule is you don’t want a lot of joints on your wall and you should have smooth, neat ones. You can use a joint compound, also known as “mud,” to smooth out and seal the joints.
Joint compound comes in two forms: powder and ready-mixed. It is recommended to use the ready-mixed compound for convenience. Stir the compound with a drywall knife to make it easier to work with. You can add a little amount of water to get the mud to a loose-enough consistency to spread on the wall. Tape the joints with paper or mesh tape. If you’re using paper tape, let it dry overnight before finishing off the seam. On the other hand, mesh tape is self-adhesive, can go right on the joints, and can be finished immediately. Make sure to get enough joint compound on the wall. A popular technique is called the “Three Swipe Method.” Swipe 1: Cover the top edge of the mud by holding just the top edge of the drywall knife tight to the wall and drawing it smoothly across the seam. Swipe 2: Do the same to the bottom with the bottom edge of the knife. Swipe 3: Finish it off by keeping the knife flat to the wall and covering the whole joint with a smooth stroke. Make sure to wipe both sides of the knife on the pan as you don’t want dried clumps of drywall to form on it. When the first layer is dry, repeat the process and make the coverage about 12 inches wide. Use a sanding block to smooth out any blemishes between coats and after the finishing coat. Joint compound is soft, so be sure to not remove so much of the material while sanding so you won’t risk fraying the paper tape.
Contractor vs. DIY?
Drywall installation can be both labor intensive and time consuming. If you’re confident about your level of DIY expertise, you can hang and finish drywall like a pro. However, there’s no shame in calling for professional reinforcement – especially if you don’t have a lot of free time at your disposal to take on this project. Hiring a professional will make your drywall construction a lot faster. On the other hand, installing drywall yourself will definitely cost less. Whether you want to do it yourself or get professional help, the important thing to consider how much your time is worth.


